2013


The Beauty Crown Awards are a yearly favorites collaborative effort including beauty bloggers around the globe.  The Beauty Crown Awards were created by Lily from Beauty with Lily Liz from My Pretty Obsessions, Jackie from Five Two Certified, and Shalunya from Shalunya & Boyet. We felt that a collaborative effort from a large number of beauty bloggers would be much more interesting to our readers and would garner more attention. The Beauty Crown Awards are a 5 week event with each week covering types of products.


Week 1 - Personal Care Products - Dec 2 - Dec 8, 2013

Week 2 - Facial Products - Dec 9 - Dec 15, 2013

Week 3 - Lip & Nail Products - Dec 16 - Dec 22, 2013

Week 4 - Eye & Misc Products - Dec 23 - Dec 29, 2013


Week 5 - Facial Care Products & Tools - Dec 30 - Jan 4, 2014


Week 1 of the Beauty Crown Awards covers Personal Care Items. Below are my Week 1 Selections:


Hair

Shampoo & Conditioner: Clear Scalp and Hair Therapy

I've used this product for a little over a year and it has not let me down. My hair is literally always shiny and smooth and I'd like to thank Clear Scalp and Hair Therapy. It is the only shampoo and conditioner that sets well with my dry scalp. I've recently switched to Vidal Sassoon and my scalp has been so dry and itchy and I really need to get this shampoo again!

Hairspray: Big Sexy Hair Spray & Play


This is one of the greatest hair sprays EVER created. My hair always tends to lose it's volume very quickly but definitely not when I use this hairspray; my big voluminous beach waves last me til the next day.


Styling Product: Redken Color Extend Shine Enrich Serum

I use this product more for the way it leaves my hair rather than the whole 'color extend' thing. I don't feel as if it helps my hair stay red, but it leaves my hair softer than ever and I only need to use a pea size amount. I've been using this product for years and thank my hair dresser for getting me addicted.


Scents

Body Mist: Victoria's Secret Sheer Love


This mist is perfect for the day time. I love how light and feminine it smell. My sister bought it for my a few months back and I was a bit weirded out at the  fact that it's white cotton and pink lily. Like what in the world does white cotton even smell like? Well it obviously smells good because I wear this mist every single day and always get compliments when I wear it.


Perfume: Viva La Juicy


Although I would wear this mainly in the spring/summer seasons, I've been wearing this perfume at night for the past month and have fallen in love with it again. I cannot express how good this perfume smells, but if you've smelt it before, you know that it smells GOOD.


Skin Care(Non-Facial)

Body Wash: Viva La Juicy


Bar Soap: Olay Ultra Moisture with Shea Butter


I love how smooth this soap makes my body feel and have been using it for years and will probably always use this bar soap.


Body Scrub: I don't use any


Moisturizer: Jergens


I've used this body lotion literally my whole entire life. I've tried multiple other body lotions and always find myself going back to this one. I thankfully never suffer from dry skin because of it.


Hair Removal: Venus Spa Breeze


I don't have much to say about this product other than it gets the job done and the gel bars are being on the razor blades is very handy since you don't necessarily have to use a shaving cream.


And that's it for my Week 1 of my All Time Personal Care Product Favorites in 2013!
If you would like to join us for Week 2: Facial Products starting Dec.9, do click on the link down below to get the list on where you can write your favorite beauty products!
To see what the other girls who are participating in the Beauty Crown Collaboration, check out the Linky Tool after this post. Click on any of the images and it will take you to that bloggers post of her Beauty Crown fave list! Also join us in our Google+ Beauty Crown Community if you have any further questions or confusions about this collaboration post.


      For quite some time, I've been into basically DIY everything. I've wanted to work on revamping up furniture, but I wouldn't have room to store everything I want to do in my house. My friend, Andrea is in the process of moving into her new house and her and I think alike when it comes to decorating and fashion so I told her about going around different thrift shops and buying old and worn out furniture and fixing it up and how much money she would save by doing it. At first, I knew she was a bit skeptical about it all until I started showing her different DIY projects on YouTube and introduced her to Pinterest. Right after, she was on board. She was amazed at how easy you can turn an old thing into something very pretty and unique. The day after, she came to my house with an antique chair she found at a thrift shop and supplies and we began to fix up this chair and I decided to take pictures of it all to show you guys and give you a step by step "tutorial".


What we used:

  • Sander
  • Screwdriver
  • Staple gun
  • A pair of scissors
  • Box cutter
  • Metallic spray paint
  • Monochrome chevron printed fabric
  • Sewing kit
For your safety: If you plan on working on something like this and will be using power tools as we did, please wear safety goggles and a mask!


First, we started off by ripping off all fabric and taking off the seat with the scissors and a screwdriver


Then, we sanded off the chair. We didn't want to sand it too much because it would ruin the whole chair and we did not want that happening so we just sanded it enough where it took off most of the gloss.


We then spray painted it and let it sit outside to dry for about an hour and then added the top coat


For the seat, we took the board and cushion and wrapped it around with white fabric, measure it a cut off all the excess and began to staple it up. My staple gun stopped working on us although it had staples in it so we then took some nails and a hammer and it did the job. The white fabric was put on messily simply because we were just going to put the chevron fabric right over - we took a lot more time making sure this one was put on perfectly. I forgot to take picture of the other cushion we did, but that one was just the stuffing and fabric and we sewed it by hand.


      Once the chair was completely dry, we screwed back in the seat and nailed in the top cushion and this is what it looks like now! It's not the most perfect looking thing, but because this was our first time upholstering anything, we are very proud of the outcome and are very excited to work on other projects.


      Since Andrea is in the process of fixing up her house and I'm working on my room, we have a lot more diy projects coming and want to show you gals what we come up with! :-)


DIY Chair Upholstry

Posted on

26 November 2013

Category

“‎There comes a time in your life when you have to let go of all the pointless drama and the people who create it and surround yourself with people who make you laugh so hard that you forget the bad and focus solely on the good. After all life is too short to be anything but happy.”-Karl Marx


       It seems to be human nature to be addicted to chaos. It's almost like we were trained that way and that it is all we've learned to know. Since it is so prevalent to have a life filled with chaos or drama, many are drawn this type of lifestyle simply because of how familiar they are with it. There comes a time in life when you realize there is a different and better way to live your life.
       Over the past few months, I've been in the process of learning more about myself and have learned that I've created a lot of unnecessary drama in the past. I look back to those years of pointless cat fights, all of the he said she said rumors, the 'you stole my guy' arguments and not to mention, the horrible anxiety attacks I dealt with because of everything going on around me and I basically trap myself in my mind forgetting that I could have easily walked away from it all and never got myself involved to begin with.
       
       As teenagers, it's like as if drama will always be around and no matter what you do, it will never end but we don't come to the realization that it is all based on the way you handle the situation and whom you surround yourself with.
       
      The way you handle drama is very important. I always thought that if I told people off and made them "look stupid", the drama would end because they wouldn't want to mess with you anymore, never realizing that all it had done was create even more drama. The easiest way to getting rid of it is to simply ignore it. Not responding to drama is a practice. Not responding to drama means silence. It means not asking questions that take you deeper into the scenario. It means neutrality and not lending energy to the person or situation. If someone repeatedly comes to you with catastrophes, give yourself a window of time when you’ll listen, and then take care of your own needs by walking away. Also, resist the urge to jump into a pity party. It is definitely very challenging, but gets easier within time. 

      It is absolutely acceptable to change your life in a way that removes certain people from it when this is what you need to do to feel more comfortable with your own life. If you discover that being friends with anyone in particular causes you any sort of pain, creates drama in your life, or makes you feel uncomfortable, then discontinue the friendship. Those people are what are considered "toxic people".
      
      In my life, I've dealt with numerous amount of toxic people that I never realized brought a lot of the drama that I was involved with, until now. I've slowly began to rid myself from them and honestly, I don't regret it at all. Getting rid of them doesn't necessarily mean that I won't ever see or talk to them again because that would take me moving far away for that to happen, but it does mean that I've gotten rid of them emotionally. I know that if I see these people, I will respectively say 'hello' to them, but I know what not to talk to them about and won't see myself making plans to hang out with them either. No one should have to be around people who bring nothing but negativity. They will do nothing but get in the way of your happiness and dreams and you definitely do not need that. When we surround ourselves with positive people, we clear away the negativity that exists around us and create more room to welcome nurturing and renewed energy. Doing this not only enriches our lives, but also envelops us in a supportive and healing space that fosters greater growth, understanding, and love of ourselves as well as those we care about. Choose your friends with care - they create the environment in which you will either thrive or wilt. Give everyone the opportunity to be a friend, but share your dreams and goals only with those who value them as much as you do.

         If you continue to remind yourself of your goals, you can avoid a lot of the unnecessary drama. Don't waste that time and energy that could be spent achieving your goals on situations that won't make a difference in your life. Drama will do nothing but attract negative energy and set you back on where you want to be in your life. Now I'm not saying that I've 100% removed all drama from my life, but since I have begun doing so, I've seen some great changes in life. If I see myself involved in something completely pathetic, I remind myself that this is not my purpose in life and continue working on my goals and dreams.


Drama Detox Diet

Posted on

19 November 2013

Category

,

AnotherGirlyBlg


The holidays are coming up which also means 2014 is right around the corner. It's crazy how quick this year has gone by! To start off the new year, Gaby (Another Girly Blog) has come up with the #2014BloggerChallenge that I am very happy to say that I've become apart of. This challenge is to write a blog post twice a month on different topics. The posts will go live during the 1st and 3rd week of each month. Everyone who decides to sign up will get the topics emailed to them by Gaby. These topics are to give you new ideas to encourage everyone to write about things they wouldn't normally write about.

ANYONE who wants to get involved, can get involved - does not matter your blog topic! The #2014BloggerChallenge is also to help you gain more traffic, discover new blogs and even make blogger friends. If you'd like to be apart of this, all you have to do is email Gaby at anothergirlyblg@gmail.com with your name, your blog url and email address - it's that simple!

Let's see how many people we can get to be apart of this wonderful challenge! If you do become a participant, I would love to know!


#2014BloggerChallenge

Posted on

12 November 2013

November is here and 2013 is almost to an end - boy, has time flown by quickly. The weather is finally beginning to cool down in Arizona and gives me so much inspiration to get dressed. Today was a very beautiful and windy day and Andrea and I decided to team up again and show you guys our outfits of the day. Today's inspiration was taking girl-ish clothing pieces and giving them a bit more edge. We absolutely love the outcome of these outfits and hope you girls do too.


For my outfit, I took this cream-colored lace skater dress I bought about a year ago. I've worn this dress maybe two times and it's been sitting in my closet since then. I felt girly and out of my comfort zone when I wore this dress that I didn't know how I wanted to make it work. The other day I came up with this outfit in my mind and could not wait to show it off. The black cable knit thigh highs paired with my cherry red Doc Martens make me feel a lot more comfortable and feel as if they 'edge' up the look perfectly enough where it doesn't take too much attention off this beautiful dress. For my accessories, I went very minimal and only wore a simple gold cross ring, these tortoise shell rounders I got on sale for 3 dollars at Target and this brown leather rucksack I thrifted and desperately needed. The rucksack was in my opinion, enough accessory for this outfit.

Dress: Nasty Gal
Thigh Highs: Sock Dreams
Rucksack: Goodwill


For Andrea's look she basically paired a very dressed up red cocktail dress with a faux leather skater skirt. The jewels along the neckline of the dress makes the dress a bit too dressy for a normal day time outfit but if you have a mind full of ideas like Andrea does, you'd find a way to still wear it without it looking 'too much'. The skater skirt calms this dress down yet still making it more edgy. On top, Andrea wore a brown mustard half sleeve to tone down the look and make it day time wearable. For her shoes, she wore these cute school boyish shoes she thrifted that can basically be worn with absolutely everything. The neckline of the dress seemed like an accessory as is, that Andrea did not need much more accessories, for it would've thrown it off.

Dress: Local shop in our town (Red Zone)
Skirt: Forever 21
Cardigan: Thrift Shop
Sunglasses: Cheeky's Boutique (another local shop)

Fall Lookbook

Posted on

05 November 2013

Category

,

,

Haai loves, these past few days I've seriously been slacking on my posting anything up onto my blog and it makes me feel bad because I made a promise that I would try to post something every single day. I did not realize how hectic my schedule would be this past week and basically have not had time for anything, I do apologize, but I have some awesome ideas and I will be trying to post a lot more.

The other day, my friend, Andrea and I have been talking about doing a fashion collab for quite some time now, but never got around to doing it. We finally got around to doing it and I'm glad we did it for our favorite seasons. We wanted to show you girls how we'd wear military colors during the fall and winter time.
*Note: We live in Arizona where it doesn't necessarily get cold which is why we wear shorts and such all year round. If you live in a colder area, feel free to change up these ideas.


For my military inspired outfit, I wore this green jacket my friend's dad, who was in the Marines gave to me a while back ago. I absolutely love this jacket; I don't really know what the material is, but it is close to being cashmere. It is so warm and adds a little something to every outfit. I will definitely be wearing this jacket quite a lot this coming winter. I paired it with a checkered long sleeve crop top that I got from GoJane. I rolled up the the sleeves on both the jacket and top to add more pattern to the jacket (this was Andrea's idea). I wore my black high-waisted distressed and studded denim shorts that I DIY'd and my trusty white and black creepers from TUK Shoes. The bowler hat the I'm wearing is actually Andrea's hat that I believe she said she got in the Halloween section. The sunglasses that I didn't get to wear due to lack of sun that day are from Old Navy, although you can't really see the beauty of them in these pictures.


Andrea's outfit is definitely my favorite out of the two. She paired these military trousers she actually got off her boyfriend with a faux leather bustier top that has spikes on the cleavage area from Urban Original. She wore my faux leather jacket that I DIY'd and Dr Martens. The faux leather edges up the look and I absolutely love it.


We have a lot more fashion collabs coming your way so I hope you enjoyed this one! Andrea does not have a blog yet, but show her some love on her social networks:

Instagram - laamuerta


xx


Military fall/winter looks

Posted on

24 October 2013

Category

,

,

If we are friends on Facebook, you may have saw my post last night basically thanking all my viewers for taking the time to check out my blog. I also said I wanted to post a tutorial everyday as a 'thank you'. I decided to continue on with my Halloween nail tutorials because I continue to come up with ideas. For today's "look", I went with Count Dracula.


Begin with applying your base coat. (I feel like I'm always repeating myself, but this very important if you don't want to stain your nails!) Once that is dry, I painted all my nails black except for my ring finger. The black polish I used was a random matte polish I found at my local oriental shop. I don't know as to why I even decided to paint my nails with a matte finish because my top coat was obviously just going to ruin that matte effect - if you would like a matte effect after you've done your design, I recommend NYC's Matte Me Crazy top coat. For my ring finger, I mixed a muted grey-ish color (Revlon's Top Speed in Stormy) and a white polish. I just felt that Stormy was a bit too dark for this look in particular and why go out an buy another nail polish when you can improvise? 
*Note: It does not matter how messy you paint your nails, all you need is a cotton swab or nail brush dipped in acetone and clean the edges as much as possible once you've finished your manicure.


I began with dipping my nail striper into black polish and drew Dracula's hair. To make the 'v' a little more defined, I took another striper with the grey/white polish mixture I made earlier and shaped it out a little more. Once you add your top coat, you won't see that harsh line that you see above on my nail.


Next, I gave Dracula some brows and drew the top of his infamous cape.


My camera's battery died shortly after. All I did was take some pastel blue polish on a dotting tool and gave him some eyes. I went with this pastel blue to add some color, but not something that was too harsh. Once that dried, I dotted on black pupils. Then, I drew a straight line for the mouth. With your nail striper and white polish, draw on Dracula's fangs; I simply did two triangles. I added some red onto his fangs because no vampire look is ever complete without some blood.


On my thumb, I drew this white arrow-like thing that is basically just Dracula's simple white collared shirt.


I then drew a simple red bow tie and added two small black lines on each side. I went back to my pastel blue and dotted on small blue dots going down the white part. (I did take a picture of that, but I accidentally deleted it)


For the rest of my nails, I simply took a cosmetics sponge, sprayed a little water on it and applied some red. I wasn't really going for an ombré look, I just wanted to add some color to the boring black. If you'd like to try out the ombré look, you can paint your whole nail red, then sponge on black and a burgundy color in between the red and black to blend it out.


I really hope you guys have been enjoying my Halloween nails. If you want to see something else, doesn't necessarily have to be nail related, do not be afraid to leave a comment with your suggestions. Thank you xo


Dracula Nail Art

Posted on

17 October 2013

Category

,


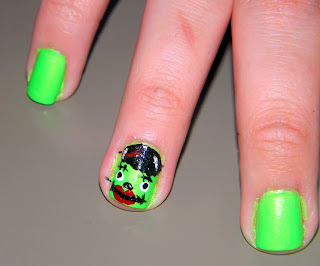
Haaai! Last night, after I posted my mummy nails tutorial, I wanted to do another Halloween tutorial as soon as possible, but I didn't know which look I wanted to do next. Then I began to stare at my nail polishes and this neon green polish stood out from all the others and immediately thought, "I SHOULD DO A CARTOON VERSION OF FRANKENSTEIN'S MONSTER!!", and that is what I did. I'm here to show you girls a quick step by step tutorial on how to recreate Frankenstein's Monster nails. I also made a female version of this monster - you know, the one Victor Frankenstein would have created if he didn't die...well at least in my imagination, that's what would have happened. Anywho, let's get started with this tutorial!


What you will need:


Start off with your base coat, as usual. Once that is dry, apply two coats of your lime green polish. I used about 3 simply because this nail polish in particular isn't very pigmented. After those have been left to dry for a few minutes, I added a top coat to speed up the process.


Female:


Dip your nail striper into your black polish and draw the hair. You can make it as messy or as neat as you choose.


For the eyebrows, I drew two horizontal lines with a slight curve and added two smaller vertical lines, kind of like the stitching.


Take your dotting tool and dip it into the white polish and make two circles under the brows. These of course, are going to be your eyes (duh, Jessica!) . Once you do that, wipe off your tool.


Take your dotting tool again, but now dip it into the black polish


Now with your striper, draw a nose and mouth


I took red nail polish with another nail striper and drew on some lips and a bow because I mean, she is supposed to bed a girl, right?


I then added some small white vertical lines onto the hair, inspired by Frankenstein's bride. Your nail now should look something like this. (Maybe even better too!)


Now for the male:


Follow the same steps as I listed above except the lips and bow (LOL). I did the infamous mono-brow but added a bit of stitching to it, as well as the mouth.


For the rest of my nails, I drew a set of stitches on them. I drew the monsters only on my ring and index fingers.


And this is my final look! I really hope you guys enjoyed this nail look. If anyone has a request on any Halloween nails you'd like me to do, leave a comment below; More will be on its way. Much love,


Frankenstein's Monster Nails

Posted on

09 October 2013